Music & Cinema Room Case Study
We helped our customer repurpose their living into a soundproofed music and cinema room, and the results exceeded their expectations.
Soundproofing Levels Achieved:
Project Overview
Generation of Building: 1976 Mid-Terraced House
Size of House: 3 Bedroom, two floors. Total 97m2.
Size of Room: L-Shaped living-dining room.
Dining room part of room: approximately 3m x 3m
Living Room part of room: approximately 4.8m x 3m. Reasonable sized living area to begin with but not huge!
Purpose of Room: Conversion to music practice room and Home Cinema room, whilst maintaining functionality of existing dining room and living room. Plan is to put an acoustic upright piano in the centre flanking wall (non party) in the dining room part of the room and home cinema in the living room part of the room.
Existing Ceiling structure: Standard timber ceiling with single layer of (non acoustic) plasterboard.
Existing Floor structure: Concrete base ground level floor. Layer of marley tiles beneath pre-existing 12mm laminate floor.
Existing Walls structure: Double breeze block party walls and single breeze block internal flanking walls (including piano wall).
Soundproofing products used:
The Soundproofing Methods
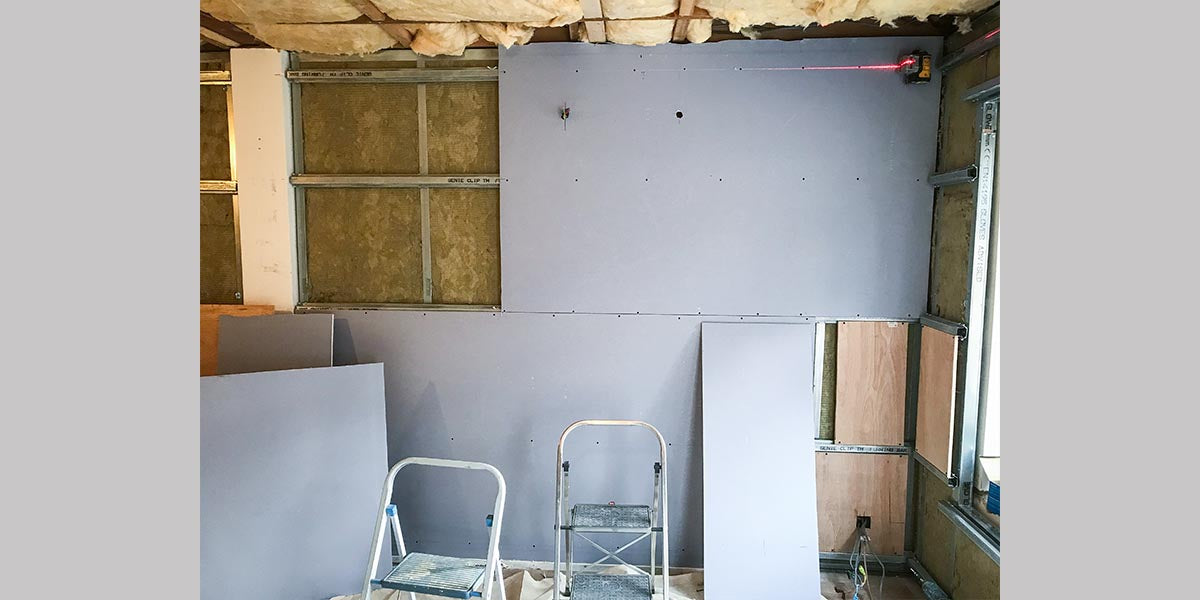
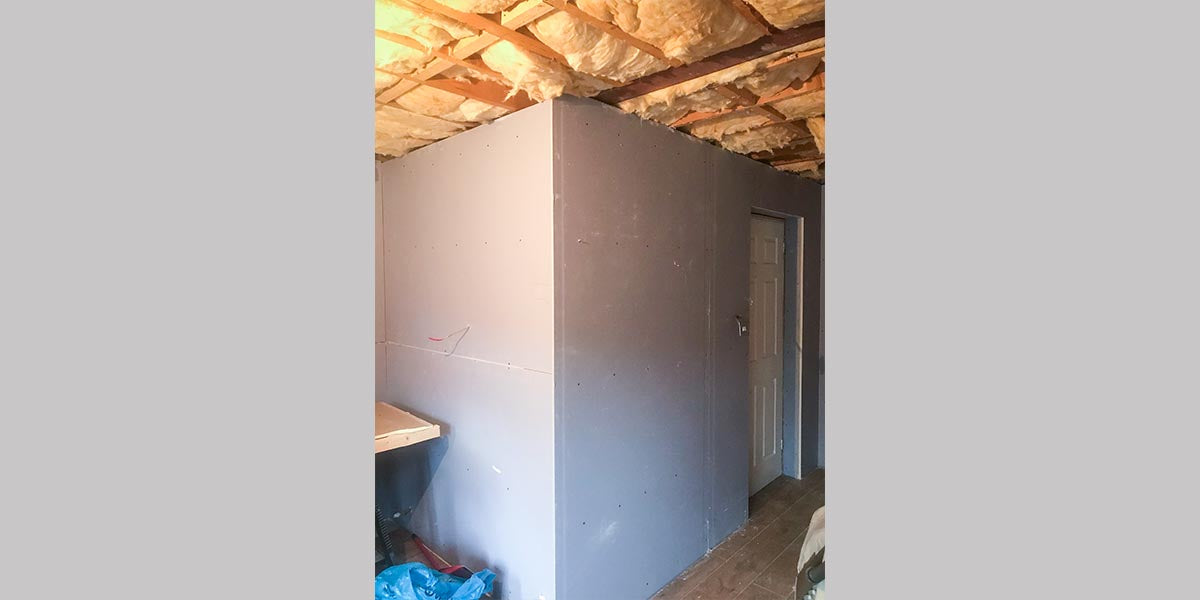
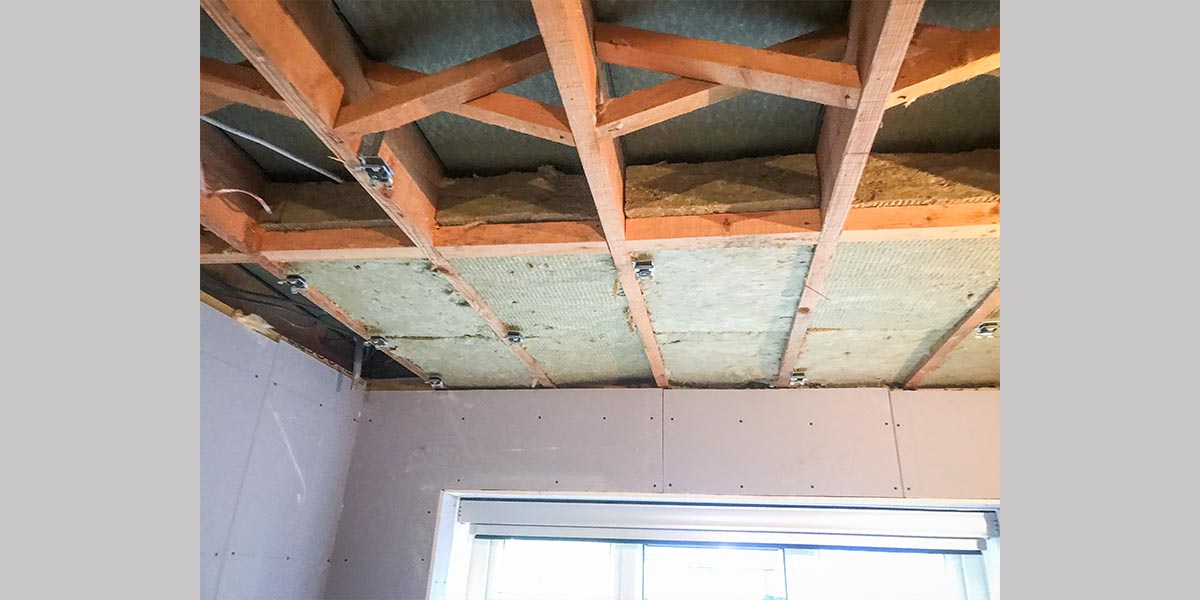
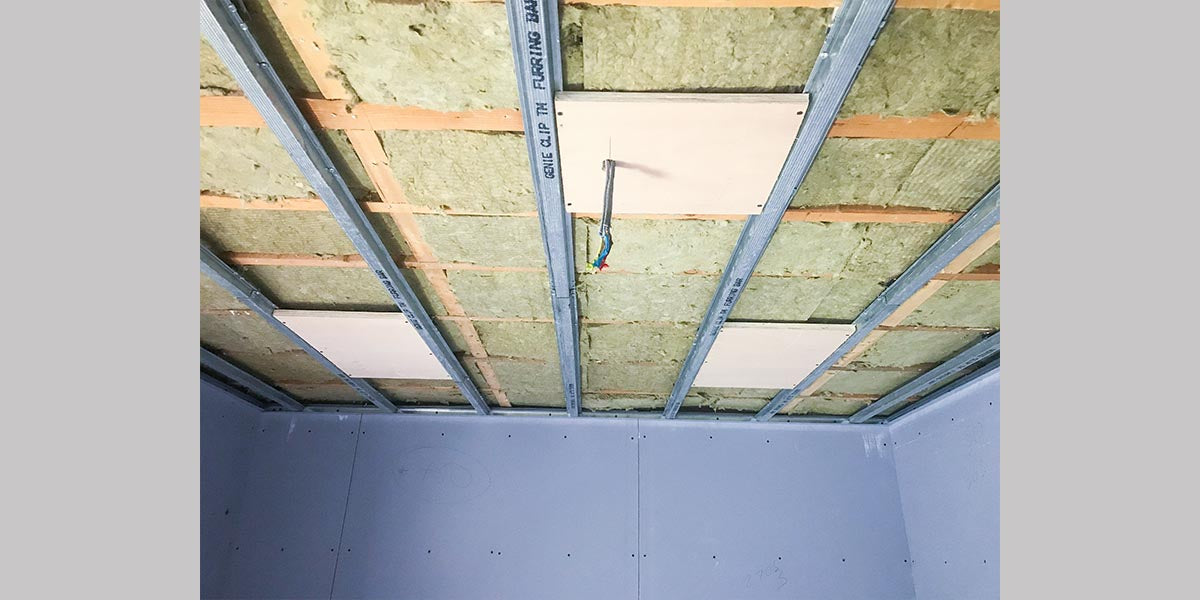
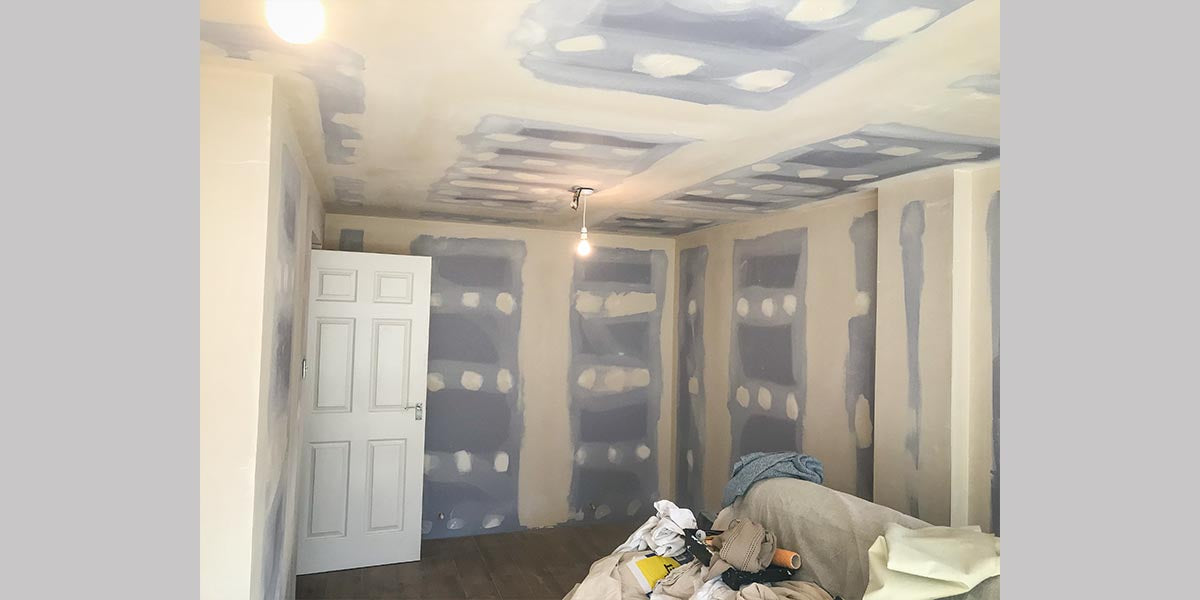
Ceiling: We removed the ceiling and created a fully floating ceiling using GenieClip LB2 (to accommodate the irregular joist heights) with Acoustic mineral wool 100mm between the joists. We erred on the side of caution and just added a single layer of 12.5mm Acoustic Plasterboard given the additional mass of the SBx/Tecsound that was resting on the floor upstairs.
Floor: Soundstop Acoustic Mat and Tecsound 70 combination beneath new 12mm laminate floor. Decided not to go any further than this method as acoustic testing after wall/ceiling completion and prior to fitting the new floor was extremely impressive and suggested we did not need to create a fully floating floor. The purpose was principally to minimise vibration from piano/bass noise.
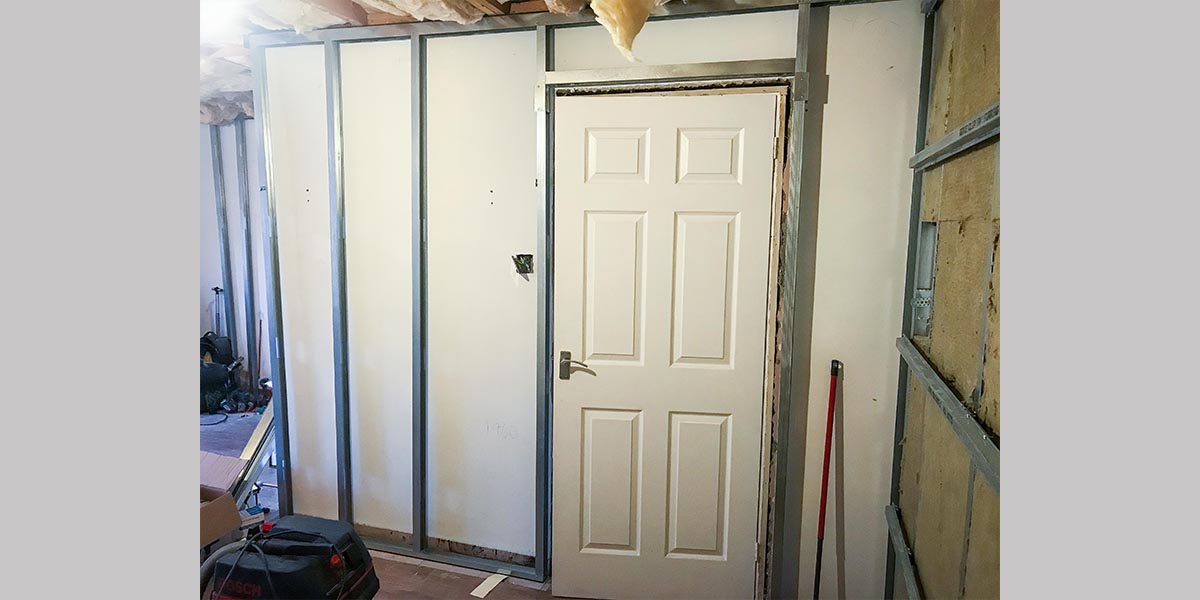
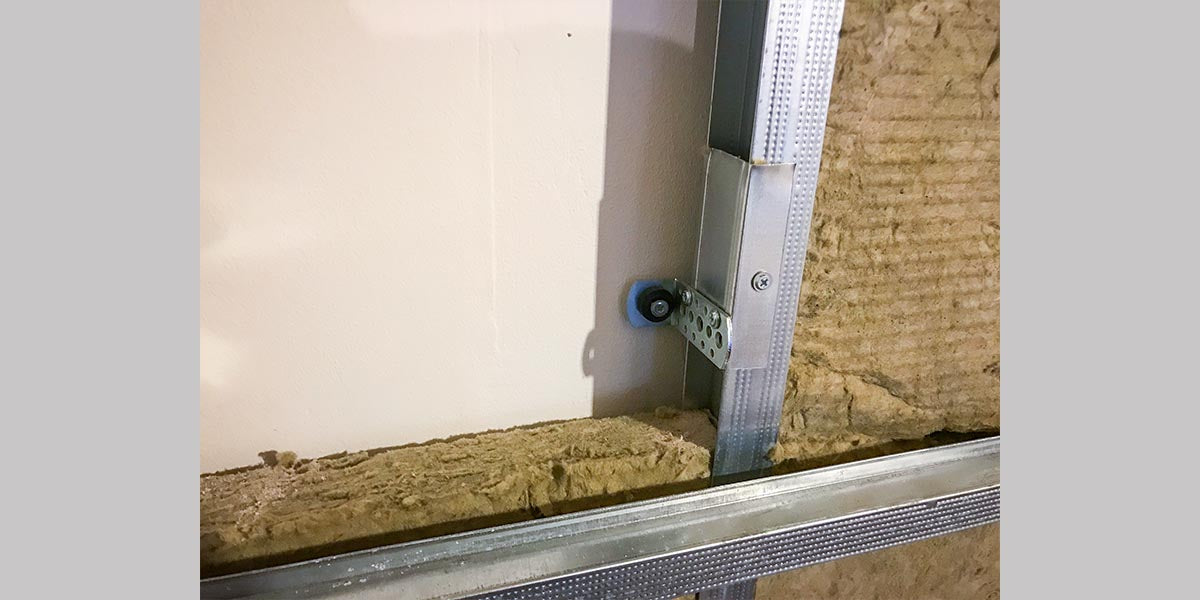
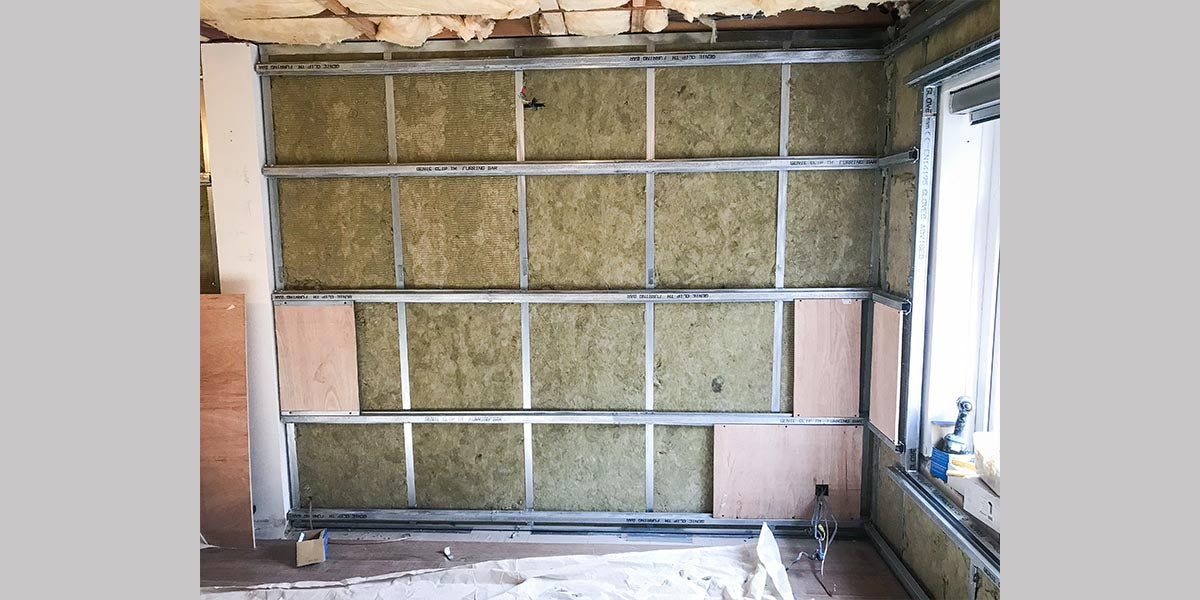
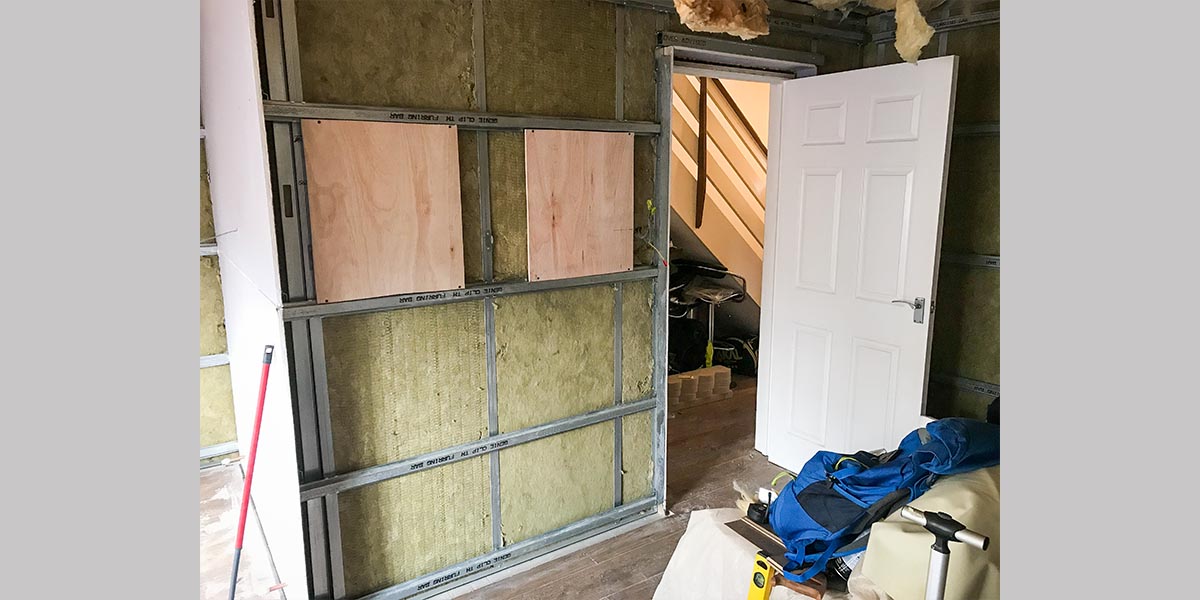
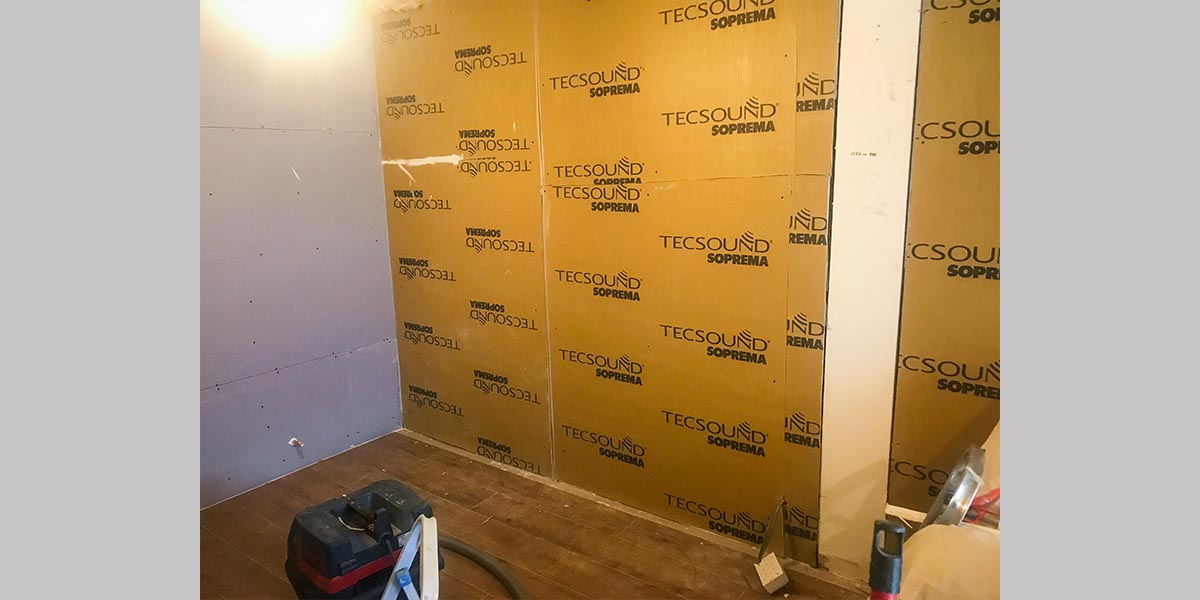
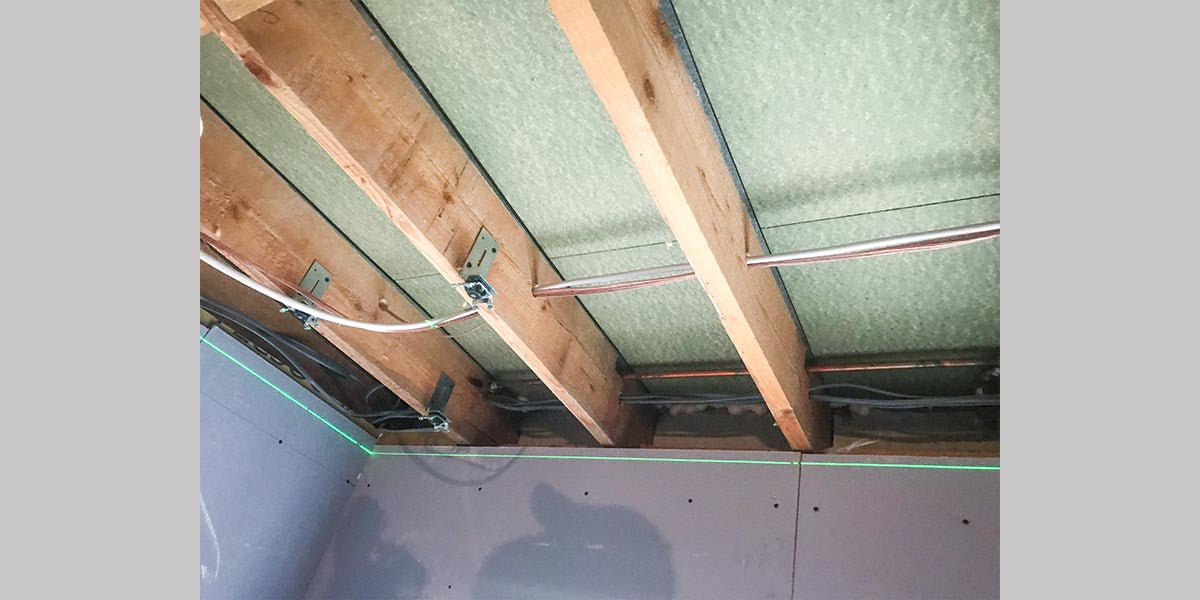
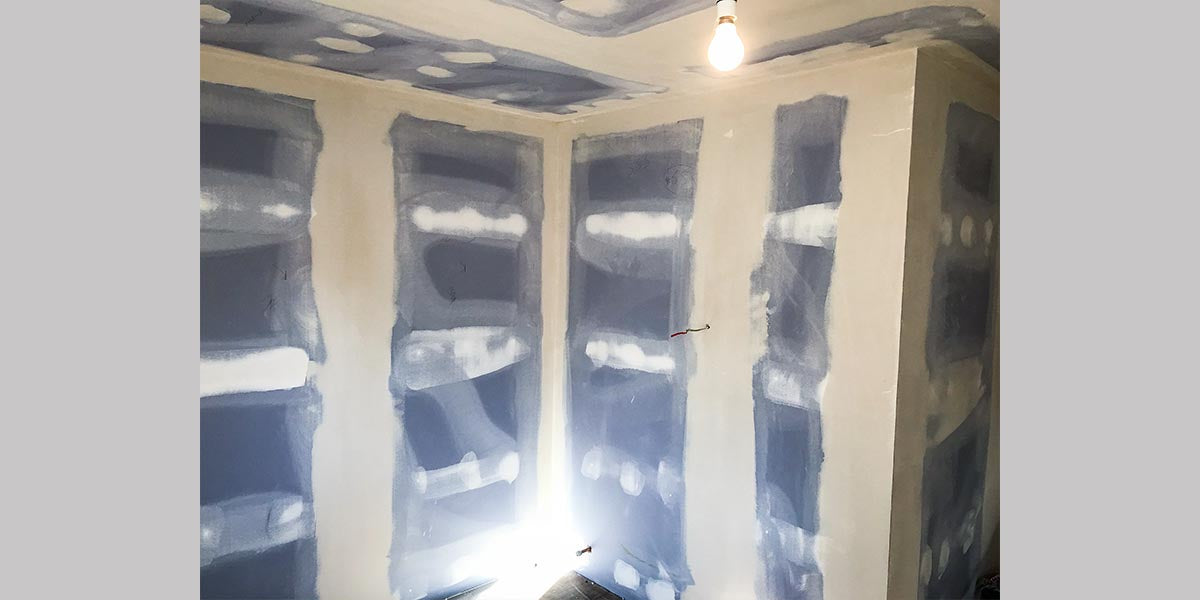
Walls: GenieClips solution using 50mm metal studs, Acoustic mineral wool 50mm, 2 x 12.5mm Acoustic Plasterboard and Tecsound 70 or Tecsound 100 for the flanking and party walls respectively. The metal stud wall structure was built with a 6mm thick Joist Isolation Strip on the ceiling/floor plates throughout and an acoustic hanger attachment for each vertical I stud to the wall (as shown in the photograph) to ensure the entire frame was fully 'floating'; this worked extremely effectively to support the attached additional load.
Additional soundproofing for upstairs floor: At the time of moving into the house we created a fully floating floor upstairs at the same time as full electric rewiring and plumbing changes were completed. Here we used a Joist Isolation Strip on the exposed floor joists with a 22mm chipboard layer 'floating' above. On top of this we added a layer of 15mm thick SBx Boards and a layer of Tecsound 50, with a new laminate floor on top. This solution alone was enough to cut out all television noise at ordinary listening volumes that wouldn't disturb the neighbours! Louder music, particularly at the bass end of the spectrum was still slightly audible, but far less than previously when even quiet conversation was clearly heard.
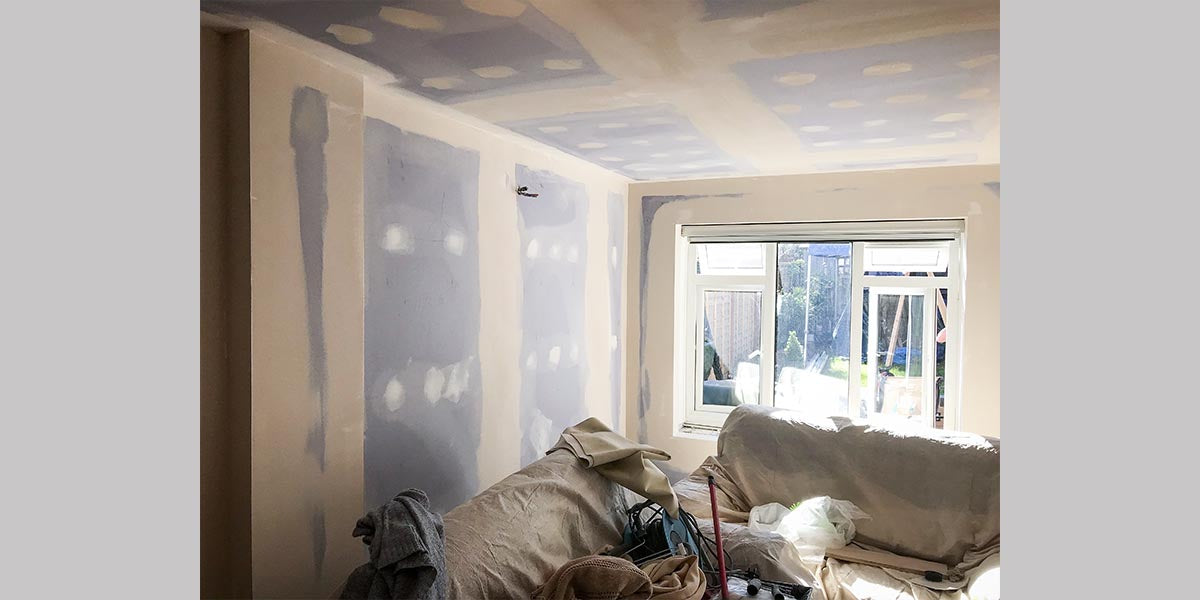
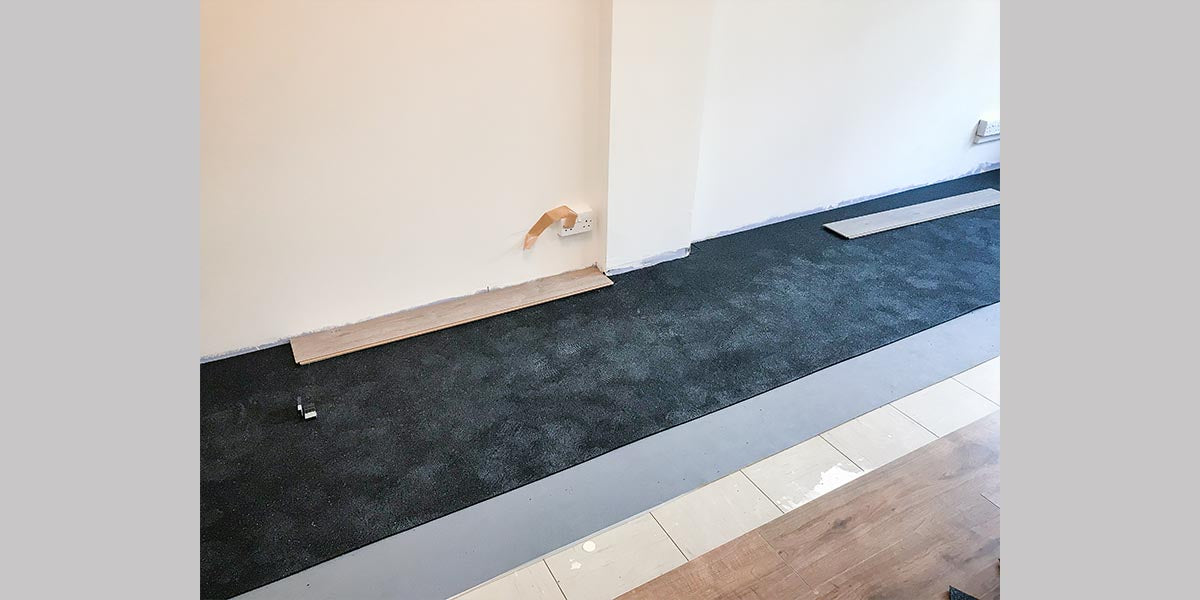
The project in photos:


Challenges faced
Breeze-block buildings flank noise very easily! For instance, television noise from the neighbouring property (on the party wall) could be clearly heard when pressing ear to the flanking walls either side of the party wall. The entire living room needed to be fully encased with a studio like floating wall construction to achieve the desired result, and I was advised by Jim to use the GenieClips and stud wall solution on all walls to overcome this issue.
The overall size of the room and maintaining a usable living space meant it wasn't practical to go beyond 50mm studs. Also the walls were markedly 'bowed' as the house was built well before the use of lasers and thus the minimum 10mm air gap between the wall and the frame increased in some instances to 20-25mm in parts. We ended up losing about 14-15cm on most walls, which was about as much as we could get away with! The finished room still felt a reasonable size at the end though, so I was happy with the solution used.
Things I wished I had known
Generally issues like these were very few as Jim and the team were superb in answering any queries I had over the several hours of phone calls it took to discuss the solutions, fitting requirements and address any questions from my builders along the way. The customer service was first rate! The only thing we remain unsure of at this stage is whether we will need to retrofit an acoustic baffle vent to the room when the windows and doors are upgraded or whether we can do without given the room is usually well ventilated as a living space most of the time.
Best solutions to problems which arose on site
With Soundstop's support we decided to butt-join the corners of the floating walls and ceiling so the entire structure minimised the use of acoustic mastic and operated essentially as a 'box within a box'. I was aware that some soundproofing sites advised decoupling each wall/ceiling corner with mastic but it was important that the finished structure resembled a living room and still made it easy to sell the house many years ahead!
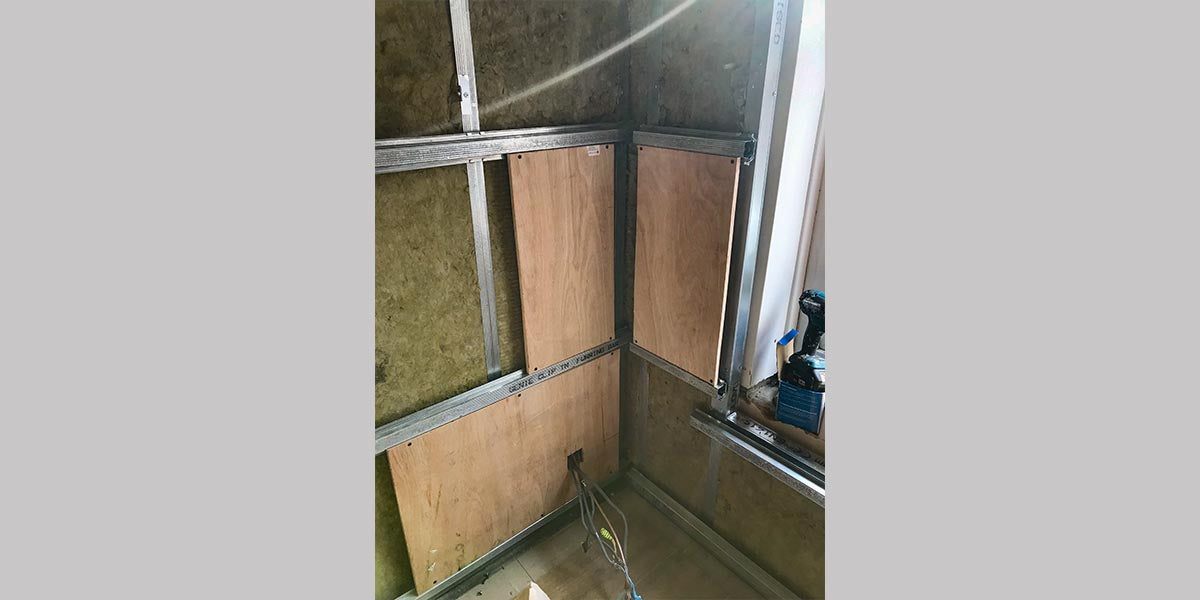
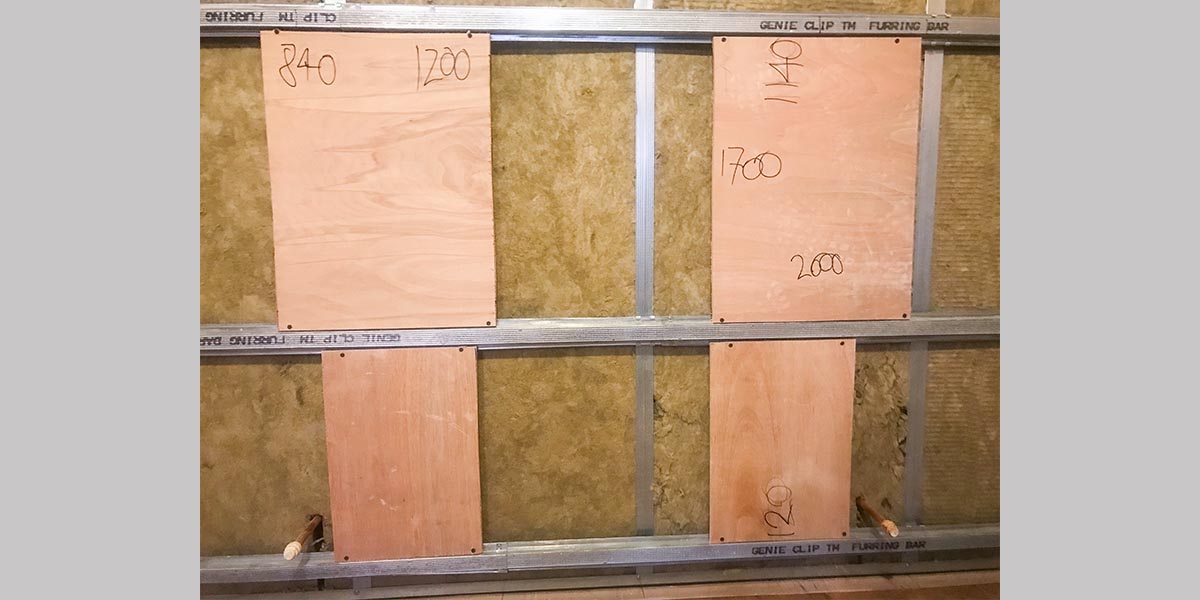
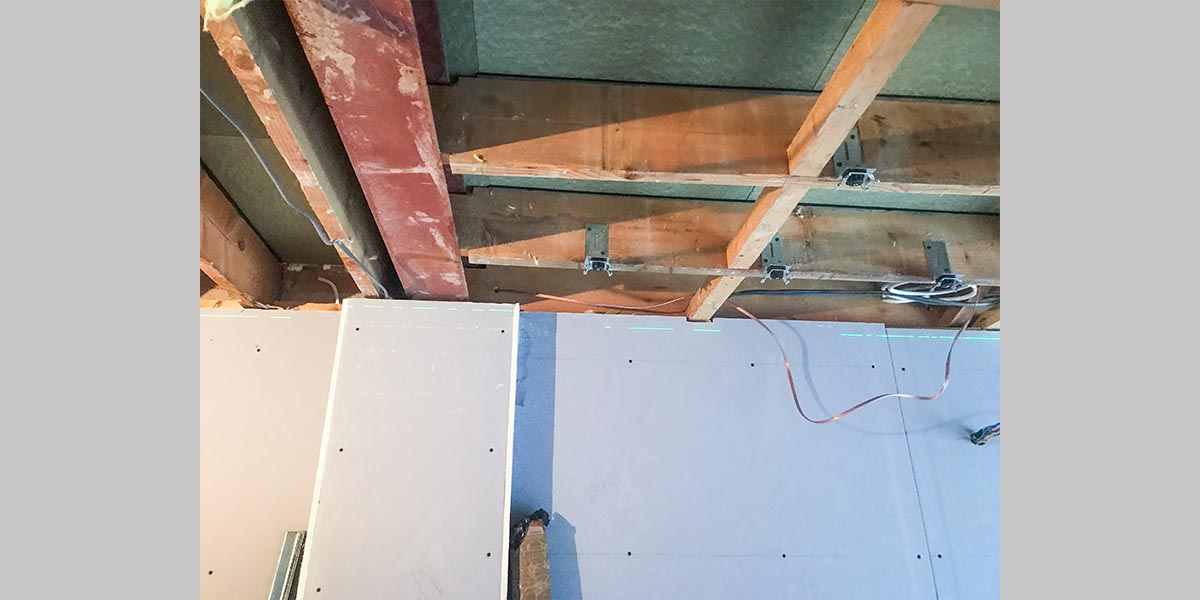
Mastic was principally used between the plasterboards and the floor (floating to fixed surface) and to fill any larger gaps between the seals. We also fitted a layer of plyboard screwed between the furring strips in any wall areas that might require heavier wall fixings (see photograph). We used 12mm ply for most attachments and 18mm for the projector / cinema screen fittings.
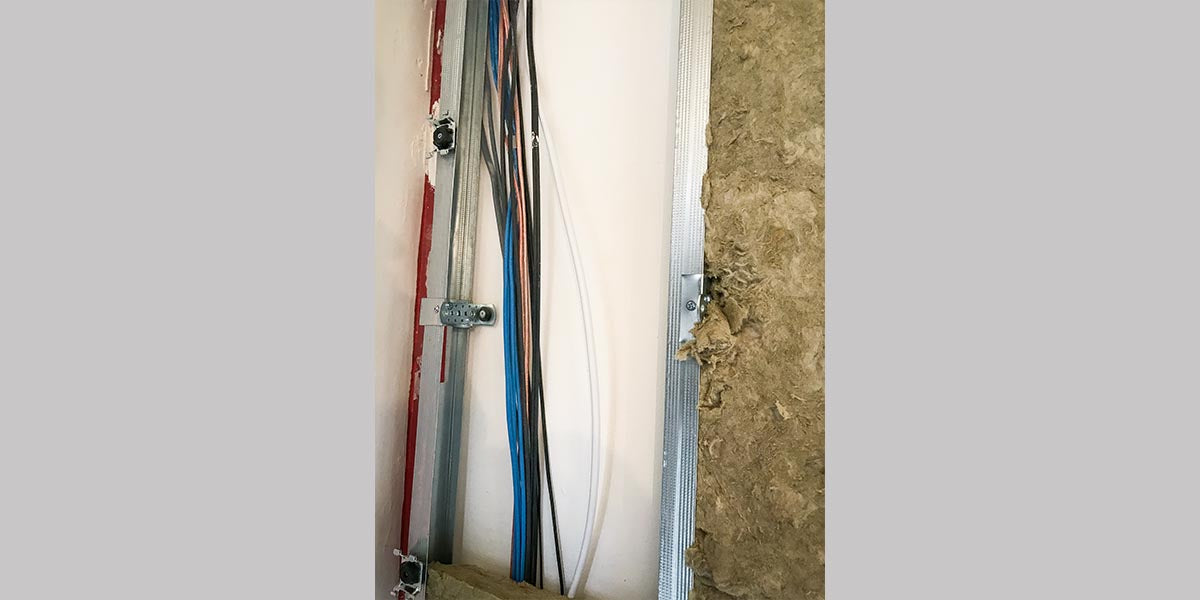
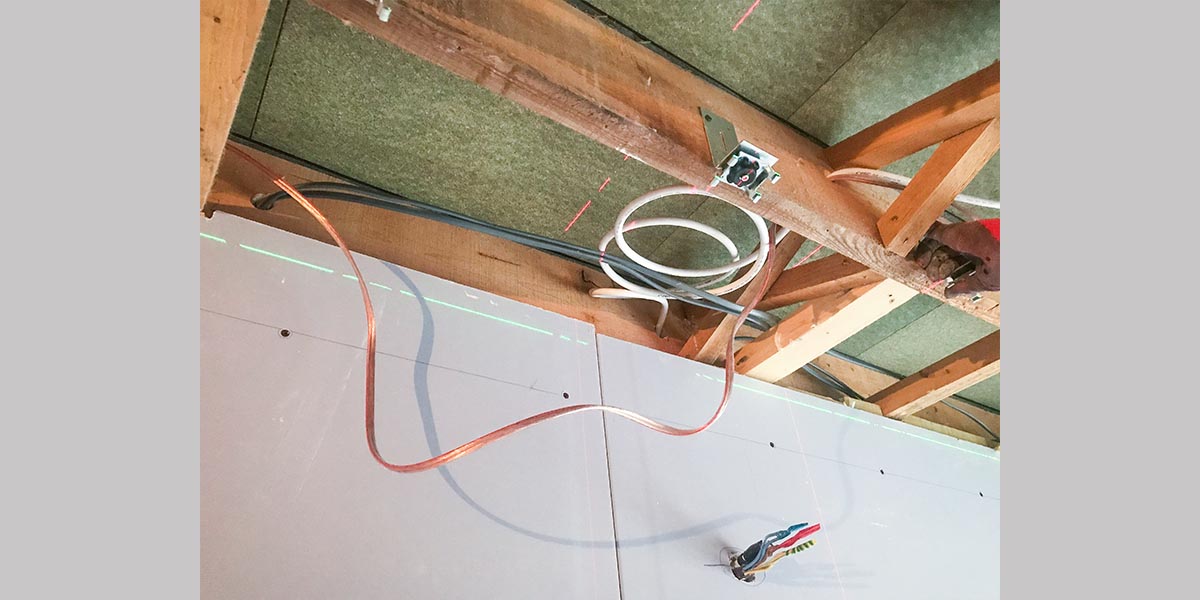
The electrics also were already externally trunked from the rewiring at the time of moving in so the main cables running down the walls from the ceiling were hidden in the new wall with a new trunking external arrangement completed beneath all plug banks/cinema/speaker plates for ease of access (see photo). These were externally mounted on a 6mm layer of plyboard to minimise the number of screws that were required to fit to the wall.
We only recess fitted the two light switches to the room (flanking walls) and one double plug socket by the backdoor, using Acoustic Putty Pad to seal as best as possible. The ceiling lights were also the surface mounted variety to minimise sound leakage to upstairs.
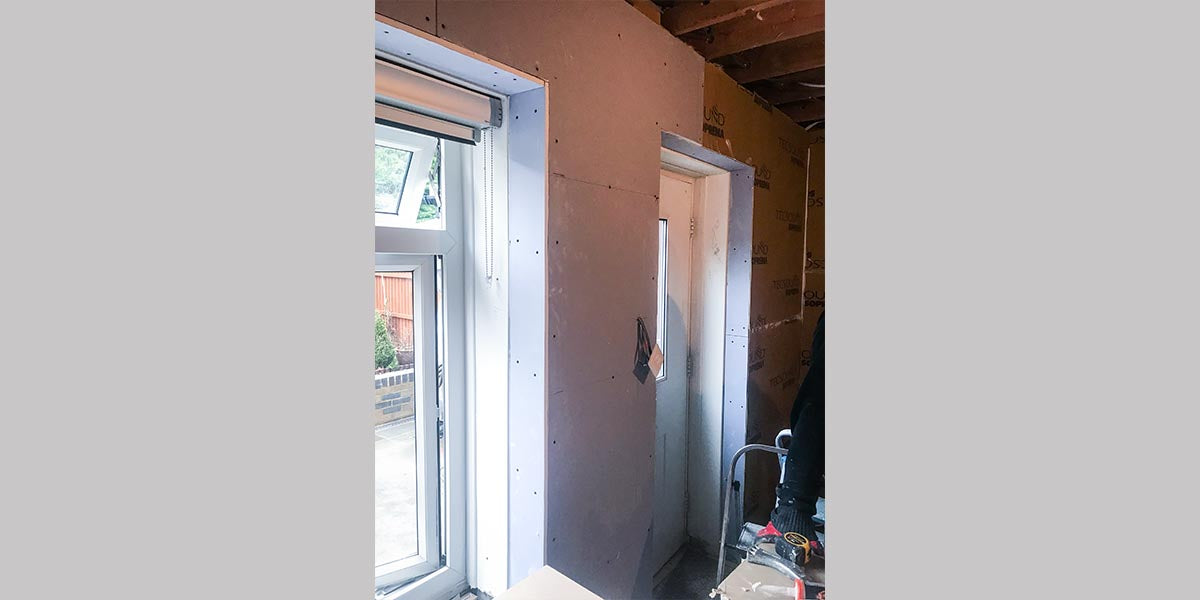
The acoustic hanger attachment from the wall to each vertical I stud was also not widely discussed on soundproofing sites but I think was integral to ensuring the entire structure performed as a fully 'floating' unit. My builders also created new window and door frames to support secondary glazing / doors with infills placed within each metal stud, with the furring channels running flush with the newly created window/door reveal openings.
We had an RSJ running up the wall and across the ceiling that we also boxed in at the wall level attaching the new boxed area to the furring channels either side (it was small enough not to need to use genie clips in front of the RSJ itself) and we placed 5cm of additional Rockwool resting on the plasterboard beneath the RSJ in the ceiling (leaving an air gap to the RSJ) to create an additional sound trap around the beam.
Overall Success and Db reading achieved
I am absolutely delighted at the performance achieved. Acoustic testing with my decibel meter using my stereo placed on a speaker stand 1m high and 0.5m from the wall revealed we were able to block all audible noise that we could hear, including bass, up to 85Db through the ceiling to the upstairs floor and 85-90db remained extremely quiet (and I had to put my ear to the upstairs floor to hear the threshold at which any sound was beginning to penetrate the ceiling/floor combination).
We performed the same test for the walls with the neighbours on one side and we had to crank the stereo in excess of 95db (i.e. the same volume as my lawnmower or beyond the very loudest fortissimo passages in my piano playing - this is crazily loud on a living room stereo!) before they could even hear a murmur. In fact, they said that they wouldn't have even heard that if they weren't trying to listen!
This represented a massive improvement over the original structure whereby we were always aware of television noise and louder talking/music and my neighbours could clearly hear my existing digital piano with the volume at 70% and played up to 85db (I played using headphones most of the time as a result). In fact all of the louder volumes now appear to be escaping only from the living room doors and windows and I intend to upgrade these shortly to acoustic door sets and windows.
I would say however that the solution works best from my end in blocking my noise leaving the room rather than all sound from the neighbours entering as some very quiet flanking noise remains in the uninsulated doorway and window recesses - showing the challenge of blocking all flanking noise from the large surface area of uninsulated breeze block on the neighbour's side. I thus intend to 'box' this noise in with a set of double leaf patio doors and secondary acoustic glazing. When the room is fully completed we will add some echo absorption panels to optimise the sound quality within the room.
Overall however, I would say I am over the moon with the improvement achieved as this is more than enough to cover the intended use of the room and it has exceeded my expectations.
We are here to help
If you have any questions, concerns or need further guidance, then our team of soundproofing experts are always on hand to guide you. With years of experience between them and a wealth of knowledge, they really know soundproofing inside and out.